All 14 chapters
In this chapter
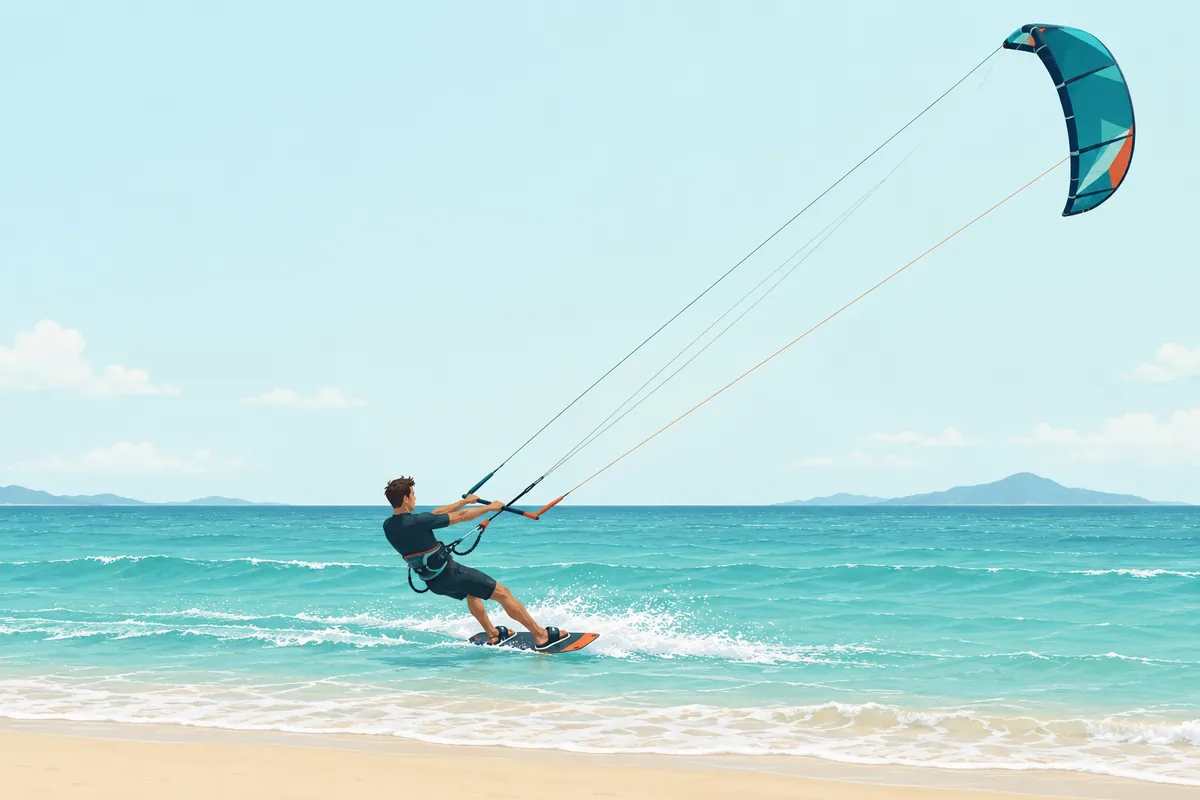
Each of these has its own pageKitesurfing is riding a board pulled by a steerable kite flown on 22–24 m lines, with a harness taking the load instead of your arms. This chapter covers how the wind window works, what kite size to fly for your weight, how to waterstart, and how to ride upwind. Most people ride independently after 15–20 hours of tuition, 20–30 hours total time on the water.
What is kitesurfing?
Kitesurfing, also called kiteboarding, is riding a small board across the water while a large steerable inflatable kite pulls you along on 22–24 m lines. The two words mean the same thing.
A harness takes most of the pull, a control bar steers the kite, and you edge the board against the water to turn that pull into forward motion, including motion against the wind. On ordinary recreational gear a rider cruises at 15–25 knots, jumps a few metres, and comes back upwind to the patch of beach they launched from.
The difficulty is front-loaded and mostly mental. The kite does the work and the harness carries it, so the sport asks far less raw strength than people expect. What it asks for is an accurate picture of where in the sky a kite makes its power. That picture is the next section, and everything else is built on it.
How the wind window works
Stand with your back to the wind and put your arms out to the sides. Everything in front of you is the wind window: a quarter-sphere of sky from the ground at your left hand, up over your head, down to the ground at your right hand.
The kite flies inside that shape and nowhere else. It cannot fly behind you, because the wind would push it out of the sky. The radius of the window is the length of your lines, 22–24 m on a normal setup.
Instructors give kite position as a clock face. Directly overhead is 12 o'clock, also called zenith; 3 o'clock and 9 o'clock put the kite down at the water on your right and on your left. The window has three zones.
- The edge of the window, or neutral zone. The rim of the quarter-sphere: overhead, and along the arc down to the water on either side. Here the kite sits at the boundary of the wind and makes almost no pull. It parks. This is where you launch, land and rest it, and a kite parked at 12 produces only gentle upward lift.
- The power zone. The middle of the window, straight downwind of you. A kite flown here takes the wind full on, and the deeper it goes the harder it pulls. A 12 m kite dragged through the centre of the power zone in 20 knots will take an adult off their feet.
- The intermediate zone between the two, where the pull is moderate and usable.
Two things follow from that geometry.
- A moving kite makes far more power than a parked one. The kite generates its own apparent wind as it flies, so sweeping it through the power zone multiplies the pull. That is why the waterstart works: you dive the kite through the power zone on purpose to make a surge that lifts you onto the board.
- Power comes from kite position, not from the bar. Beginners treat the bar as a throttle. It is the fine trim. The coarse control is where in the window you fly the kite. Park it at the edge and even a big kite goes quiet; swing it through the middle and a small kite hits hard.
How the control bar changes the kite's power
The bar's second job, after steering, is setting the kite's angle of attack: how squarely the canopy faces the wind.
- Sheeting in, pulling the bar toward you, tightens the back lines, tilts the canopy to catch more wind and adds power. It is the accelerator.
- Sheeting out, pushing the bar away, slackens the back lines, lets the canopy weathervane flatter to the wind and dumps power.
Out of that comes the most counter-intuitive reflex in the sport: when you are overpowered and frightened, push the bar away rather than pull it in. Every instinct says grip and pull, and pulling powers the kite up further. Letting the bar out, or letting go of it altogether, depowers the kite, because the bar slides up the depower line and the kite flags out flat.
The bar, lines and harness explained
A modern kite system has four lines, sometimes five, and several layered safety releases. The chain from kite to rider runs like this.
- Front lines, also called centre lines. Two lines from the kite's leading edge, through the centre of the bar, to the chicken loop: a rubber-coated loop that hooks onto the metal hook of your harness. These carry roughly 80–90% of the kite's load, which is why the pull ends up in your body and not your arms.
- Back lines, the steering lines. Two lines from the kite's wingtips to the ends of the bar. Pull the right end of the bar down and the right wingtip brakes, so the kite turns right; pull left and it turns left. The kite always turns relative to its own nose, including when the nose is pointing at the water, which is the part that catches people out.
- Depower system. The front lines anchor to your harness and the back lines to the sliding bar, so moving the bar along the centre line changes the front-to-back ratio. That is the sheeting mechanism above. A trim strap or cleat sets the range for the day.
- Quick release. The chicken loop carries a push-away release. Fire it and the loop opens, the bar flies away, and the kite flags out on a single front line through your safety leash, losing nearly all its power at once. That is safety level two; level one is letting go of the bar.
- Leash release. The last level. The safety leash has its own release that separates you from the kite entirely, for when a flagged kite is still dragging you somewhere bad.
- The harness, either a waist harness (most common) or a seat harness, which schools like because it cannot ride up and gives a lower tow point for body dragging. It puts the load on your core and hips and lets you ride for hours without your arms giving out.
The kite itself is a leading edge inflatable, or LEI: an inflatable frame, pumped to roughly 6–9 psi, holds the shape, keeps the kite floating, and lets you relaunch it off the water. That last property is what made the sport learnable. Beginners fly bow, delta or hybrid shapes, which have big depower ranges and relaunch easily.
What kite size for your weight and the wind?
Kite size is measured in square metres and matched to wind strength and rider weight. For a 70–85 kg rider on a twin-tip, this is the table the atlas uses as its 2026 default when a spot has no quiver note of its own.
| Wind | Kite size |
|---|---|
| Light wind, 10–14 knots | 12–15 m² |
| Medium wind, 15–20 knots | 9–12 m² |
| Strong wind, 21–30 knots | 6–9 m² |
A 9 m and a 12 m are the classic first quiver. On the Greek Meltemi spots that pair covers roughly 90% of summer days for a 75–85 kg rider, with a 7 m added for the July and August weeks when the wind runs into the high twenties.
Beginners learn best in 12–20 knots of steady wind, enough for the kite to fly crisply and pull you onto the board, not so much that every mistake is amplified. Below about 10–12 knots most kites will not make enough power to ride.
Above 25 knots is expert territory. Where a spot has its own quiver note the spot page carries it, because local gusts and water move the numbers more than the forecast does.
Kite control drills before you touch a board Beginner
Before the board appears you have to fly the kite without thinking about it. These drills are learned on land, first on a 2–3 m trainer kite, then on a full-size kite.
- Parking the kite. Hold it motionless at 12, then at 11, at 1, at 10, at 2. A parked kite is a quiet kite, and the ability to stop moving the kite is the skill beginners lack most. Oversteering, the constant nervous correcting that swings the kite through the window, is the main source of unwanted power.
- Figure-8s, also called sine waves. Steer the kite in a smooth infinity pattern between 10 and 2 o'clock, then deeper, between 9:30 and 1:30. The figure-8 sweeps the kite through the power zone rhythmically and is the engine of the sport: gentle 8s at the edge for cruising power, deep aggressive 8s for the surge that gets a heavy rider planing in light wind. Learn to make them big and slow, then small and sharp, on command.
- One-handed flying. Park the kite at 12 or 11 and fly it with one hand at the centre of the bar. You need the free hand to pull the board into position, get your feet in the straps, fix your gear and signal to the beach.
- Power strokes. One deliberate dive from 12 down through the power zone to 2, or to 10, making a single controlled surge of pull. This is the movement that later becomes the waterstart. Practise it on land and let it drag you a few steps downwind: that is how you calibrate how deep a dive produces how much pull in the wind you actually have.
- Eyes off the kite. From the first hour, feel the kite's position through bar pressure instead of staring at it. Riders who never break the habit of watching the kite cannot watch where they are going, which caps both their progression and their safety.
Watch · 1

How to launch and land a kite safely
Launching and landing are where riders get killed. In the worldwide analysis of kiteboarding fatalities from 2000 to mid-2006, launching accounted for 23% of deaths and landing for 31%, more than half the total, almost all of it within a few metres of hard ground.
A kite at the water's edge sits in the same wind as a kite 20 m up, except that here there are walls, cars and bystanders. Launch and landing are choreographed procedures, run on standard hand signals.
Assisted launch
- Set up and check. The rider lays the lines out upwind of the kite, connects, hooks in and does a final line check.
- The helper presents the kite. They hold it in a C shape, leading edge facing upwind, one wingtip on the ground, centre strut roughly parallel to the ground.
- Walk to the edge of the window. The rider puts the kite at roughly 9 or 3 o'clock and takes tension. If the kite pulls hard or flaps violently, the position is wrong; it should sit calmly with the canopy lightly loaded.
- Signal and release. The rider gives a clear thumbs-up, the helper releases the kite rather than throwing it, and the rider steers it slowly up the edge of the window toward 12.
Assisted landing
- Signal the landing. The rider brings the kite low to the edge of the window and pats a flat hand repeatedly on top of the head. They repeat the signal back.
- The helper catches the kite. They walk downwind of it, catch it by the centre of the leading edge and turn it leading-edge-down on the ground.
- Secure it immediately. The rider unhooks at once, or the helper weights the kite with sand or a board.
Two more signals are worth memorising. A thumbs-down or a flat outstretched palm means stop, abort. Both arms waved slowly overhead means distress, come and help. Signals exist because at 24 m of line in 20 knots of wind nobody can hear anything.
Self-launch and self-land Intermediate
Solo techniques do exist. The safest self-launch uses a fixed anchor point, a post or a buried strap, which lets you tension and check the lines before you hook in. To self-land, fire the quick release, let the kite flag out, and walk hand-over-hand up the safety line to the kite. Neither is a beginner skill, and no school teaches them as one.
Watch · 2


What you learn in kitesurfing lessons, stage by stage
Lessons follow a near-universal sequence. Of the 790 schools in the atlas that state a certification, 549 teach to IKO and 136 to VDWS, which dominates the German-speaking countries; BKSA appears on 9. The school pages say which body each school teaches under. Do not skip stages.
Stage 1: theory and kite control on land, hours 0–4 Beginner
Wind theory, the wind window, reading a spot, setting up the gear, the safety systems. Then flying: parking, figure-8s, power strokes, one-handed control, assisted launch and landing, and firing the quick release until it is reflexive.
Stage 2: body dragging, hours 3–8 Beginner
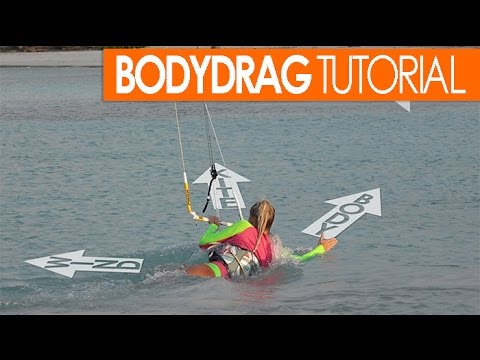
In the water without the board, letting the kite pull you: first downwind, with the kite in gentle figure-8s while you swim-drag, then directional and upwind. Upwind body dragging is the quietly critical one.
Park the kite at about 10:30 or 1:30 with one hand on the bar, extend the other arm and your body as a keel, head slightly ahead of your feet, and knife through the water at up to 45 degrees against the wind.
This is how you get your board back every time you crash away from it, which as a beginner is constantly. Deep-water pack-down and self-rescue, winding the lines in and using the kite as a sail and a raft to reach shore, are taught here too.
Stage 3: the waterstart, hours 6–15 Beginner
The gateway. Sitting in the water, board on your feet, kite parked at 12: point the board about 45 degrees downwind, steer the kite slightly back to one side, then dive it hard through the power zone in the direction you want to go. The surge pulls you up and over the board.
You rise with your weight low and the back foot pressed, ride away for two seconds, then crash. That is normal: the waterstart is a timing skill and almost everyone needs dozens of tries. The faults are diving the kite too timidly, so you flop back, diving it too hard, so you are ripped over the nose, and standing up straight too early.
Stage 4: first runs and controlled riding, hours 10–20 Beginner
Rides stretch from seconds to hundreds of metres. You learn speed control, edging harder to slow and bearing off to accelerate, stopping without a crash, riding both directions, and relaunching the kite off the water. Every session still ends downwind of where it started. That is the walk of shame, and everyone does it.
Stage 5: staying upwind, hours 15–40 Intermediate
This is the skill that makes you independent. The recipe: kite parked and still at about 45 degrees, since working the kite drags you downwind; board carving on its heelside edge; weight back and low; hips open; and the piece every instructor repeats, look where you are going, not at the kite. Looking upwind opens your shoulders and hips and sets your edge for you.
Looking down at the kite locks your body downwind. The classic mistakes: kite too high, which lifts you off your edge; kite too low and sined too much, which drags you downwind; pinching so hard upwind that the board stalls. When you can go out, ride both ways and come back to your towel, you are an independent kitesurfer.
Watch · 5


How long does it take to learn to kitesurf?
The timings schools work to, in hours of instruction rather than days on the beach:
| Milestone | Typical time |
|---|---|
| First controlled rides on the board | 6–12 hours of instruction, usually a 2–3 day course |
| Independent kitesurfer: both directions, upwind, launch and land, self-rescue | 15–20 hours of tuition, 20–30 hours total time on the water, commonly 3–5 lesson days over one to three trips |
| Comfortable upwind in varied conditions | 20–40 hours on the water |
| First jumps and transitions | Within a first full season, roughly 3–4 months of regular wind |
Three things move you toward the fast end of those ranges.
- Consistency. Three days in a row beats six scattered weekends.
- Conditions. Steady 15–20 knots over water you can stand up in. The lagoon at Le Morne is roughly 60–80 cm deep across a wide flat, and Lagoa do Cauípe, 7–8 km down the beach from Cumbuco, is shallow enough to stand in over most of it at 27–30 C. Standing up after a crash instead of dragging back to your board can halve the hours you need. Tarifa teaches thousands of people a year and is not that water: Poniente runs 12–22 knots over chop and small waves, Levante 20–40. Read the depth and the wind range on the spot page before booking.
- Feedback. 241 of the 1,606 schools in the atlas teach with radio helmets, and the school listing says which. A correction while you are still doing the thing wrong saves weeks of grinding it in.
Other board sports help a little once you are on the board, wakeboarding most of all. Kite control gates progression, and there everyone starts level.
Money, at 2026 prices. A private lesson hour is €60–90 in Europe (2026) and $90–160 in the United States (2026); a group hour is €30–45 a head (2026). A beginner course of 6–10 hours runs €300–500 in Europe (2026) and $700–1,100 in the US and Caribbean (2026).
A complete new setup of kite, bar, board, harness and pump costs $1,800–2,200 in mid-range gear (2026), more with premium constructions; a well-kept used rig is $1,200–2,500 (2026). Each school page carries its own prices with the year they were quoted.
What a first season actually looks like: three days of feeling clumsy, one afternoon when the waterstart suddenly works, then a few months of chasing the upwind skill. Nearly everyone who gets through 15 hours of instruction rides. Almost nobody who rides stops.
Questions riders ask
How long does it take to learn to kitesurf?
Six to twelve hours of instruction for the first controlled rides, 15–20 hours of tuition (20–30 hours total time on the water) to be independent: both directions, upwind, launch, land, self-rescue. Shallow water and three days in a row push you to the fast end.
What kite size do I need for my weight?
For a 70–85 kg rider: 12–15 m² in 10–14 knots, 9–12 m² in 15–20 knots, 6–9 m² in 21–30 knots. Add roughly 1 m² per 5 kg above that weight range and take a size down in gusty wind.
How do you waterstart?
Sit in the water with the board on your feet and the kite at 12, point the board about 45 degrees downwind, then dive the kite hard through the power zone in the direction you want to go. Come up with your weight low and the back foot pressed. Most people need dozens of attempts.
What do you do when you are overpowered?
Push the bar away or let go of it, which leaves the kite about a quarter of its power. If that is not enough, fire the chicken-loop quick release and the kite flags out on one line. The leash release, which separates you from the kite, is the last step.
How much wind do you need to kitesurf?
Twelve to 20 knots of steady wind is the learning band. Below about 10–12 knots most kites will not make enough power to ride; above 25 knots is expert territory. The spot page gives the usual range and the months it blows.
Can you teach yourself to kitesurf?
No. Beginners are injured at about 65 per 1,000 hours against 1.1 for professionals, and launching and landing together accounted for 54% of deaths in the 2000–2006 fatality analysis. Those are the moments a lesson covers first.
Chapter 02 · Part I · First Principles