All 14 chapters
In this chapter
Each of these has its own pageThis chapter is the ladder above riding upwind: how to ride toeside, how to jump on a kiteboard, how to do a back roll, how to learn a kiteloop without breaking yourself, and how to get a hydrofoil flying. Every move comes with the wind range, the kite size and the water that make it easiest to learn. The last two sections cover big air competition and how to train so you stop plateauing.
Each rung rests on the one below it. Toeside feeds carves, carves feed jumps, jumps feed rotations and loops. Skipping rungs is the most common cause of injury and of frustration in this sport. How you train counts as much as the order you learn in, which is why the chapter closes on method: research, visualisation, session structure, video review.
How to ride toeside
Intermediate Toeside means riding with your toes, not your heels, pressing the edge into the water. It is the first trick most riders learn, and it unlocks almost everything above it: carving transitions, wave riding on a directional board, and rotations that land in a switch stance.
The technique is posture, not strength. Get a good length of the board's rail into the water, stance wide, weight across both feet. Drop your back knee and drive it forward toward your front leg.
That rotates your hips to face the direction of travel and lets you resist the kite's pull with your skeleton instead of your quads. Chest open toward the kite, leading shoulder back, weight a little further forward than it sits on heelside.
There are two ways in, and both are worth owning:
- The switch, or pop to toeside. Ride slightly off the wind, take a small hop or flatten the board for a moment, and swivel hips and feet 180 degrees. Low commitment, works in any conditions.
- The carve to toeside. Bank the board through a smooth arc from heelside edge to toeside edge while you redirect the kite. This is the foundation of every carving transition and of all wave riding.
How to do a carving transition
A carving transition is one continuous banked turn: no stopping, no sinking, spray off the rail. It has two halves. The first carves you from your edge to pointing straight downwind. The second completes the arc until you exit riding on the opposite tack.
Kite work makes or breaks carves. As you initiate, drift the kite up toward 11 or 1 o'clock, then redirect it smoothly across the window slightly ahead of your board for the whole turn. Redirect too early and you get yanked flat; too late and you sink out mid-carve. Enter with moderate speed, because the carve scrubs speed while it loads the lines.
Carve both directions before you try jumping. A rider who can carve either way with the kite low already has the bar timing a jump needs.
Watch · 1

How to jump on a kiteboard
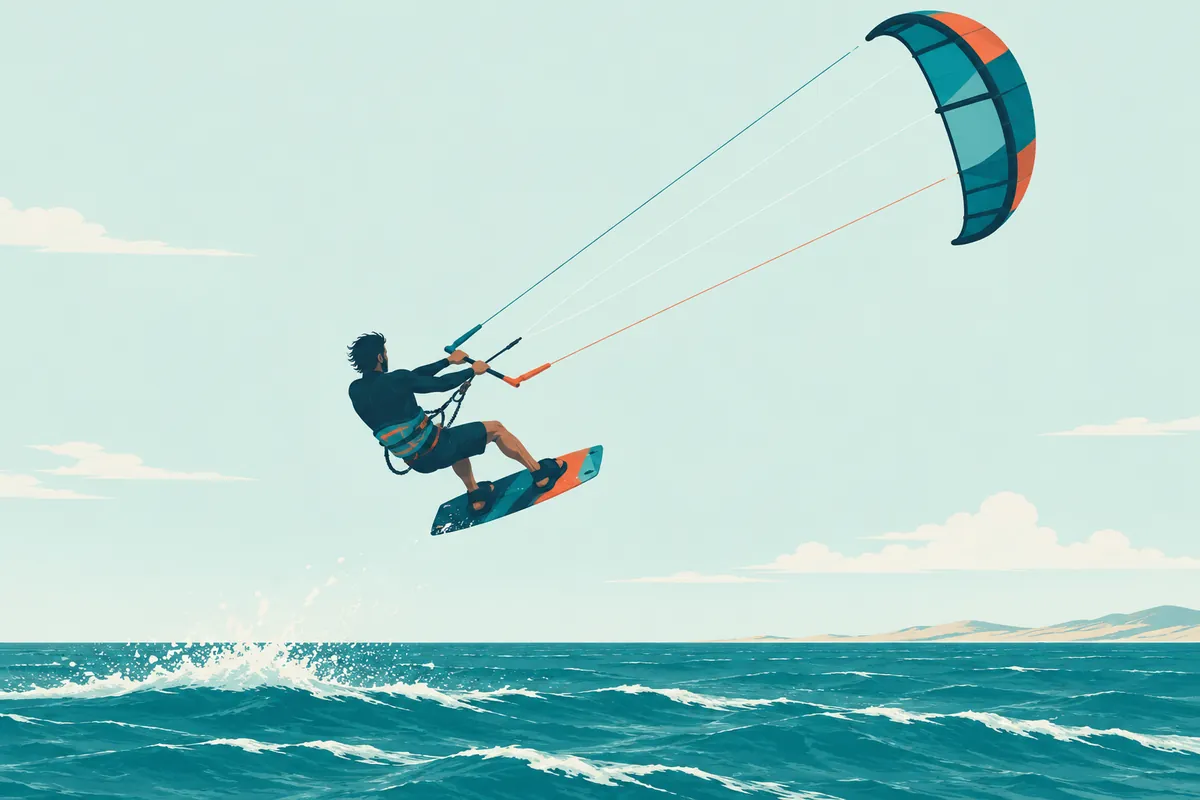
Intermediate A first jump is learnable in one good session if the conditions are right: roughly 15–20 knots of steady side-onshore wind, a kite at the top of its comfortable range (a 12 m in 15–25 knots is the classic learning setup), and flat-ish water with plenty of room downwind. The move has three beats.
- Load. Ride across the wind with good speed, then carve progressively upwind and edge hard: heels dug in, body leaning back and out, lines coming under visible tension. Coaches call it the J-hook, because your wake curves upwind like the tail of a J.
- Send, with the bar out. Steer the kite quickly from its riding position, around 10:30 or 1:30, up toward 12 o'clock, and do it with the bar sheeted out. That lets the kite travel fast to the zenith without ripping you off your edge early.
- Pop and sheet in. As the kite approaches 12, explode off your back leg, pull your front knee up, and sheet the bar all the way in at the same moment. Line tension from your edge, lift from the send and your own pop turn horizontal speed into height.
Timing. You want the kite arriving at 12 exactly as you commit. Late, and you get dragged flat off your edge with no lift. Early, and you get lofted off balance. Almost every failed first jump is one of two errors: pulling the bar in before the edge is loaded, or hucking, which means throwing the body at the trick instead of trusting the sequence.
In the air and landing. Keep the bar sheeted in for the whole flight, because canopy tension is what keeps the kite flying and you underneath it. For the first few, leave the kite near 12 and land.
Once landings feel controlled, add the redirect: as you start to descend, steer the kite forward in your direction of travel, back toward 10:30 or 1:30, so you land moving, board pointing slightly downwind, knees soft, the way a wakeboarder absorbs a wake.
How to jump higher
Height comes from refinement, not violence.
- More speed in, harder edge. Height scales with line tension at the moment of release. Approach faster, carve upwind harder, hold the edge a beat longer.
- Sharper send. A quicker, more decisive pull on the back hand makes the kite generate more lift as it sweeps up through the window.
- Ride powered. At the top of your kite's range the lift is easy. Underpowered, only perfect technique buys you modest height.
- Kite choice matters. Five-strut, high-aspect kites, the modern big air school, boost higher and hang longer than three-strut freeride kites.
- Learn the downloop landing. From moderate height, as you descend, loop the kite down and away in your direction of travel. It traces a tight circle above and in front of you and pulls you forward into a soft, fast, downwind landing. It is a skill in its own right, the second rung of the kiteloop ladder below, and it is what makes bigger jumps survivable.
For reference: recreational riders with good technique boost 5–10 m, and competition big air riders in Cape Town storm winds pass 25–30 m.
Watch · 2


How do you do a grab, a back roll or a board-off?
Grabs are the cheapest style upgrade. Start with a tail grab: back hand to the tail, back knee bent, the board coming up to you while your chest stays upright. An indy or a melon mid-jump works the same way. The front hand stays on the centre of the bar so the kite sits still. A grab mid-rotation also slows the spin and builds air awareness.
The back roll is the rotation most riders land first, and the most popular trick in kiteboarding. It is a jump plus a backward-leaning rotation started at takeoff: as you pop, throw your head and leading shoulder back over your trailing shoulder and drive your front knee toward your chest.
The head steers the rotation. Look over your shoulder to spin, spot your landing to stop. The front roll comes next: head and front shoulder diving forward and down, knees tucked. Then the combinations, rolls with grabs, then doubles.
Board-offs are the old-school crowd pleasers, and they need consistent, floaty, well-powered jumps first. The progression runs tail grab → one-foot, back foot out → full board-off → board spins and leg-overs.
Take the foot, or the board, off before the apex, so the whole descent is available for getting it back on. Loosen your straps slightly. Keep the front hand centred on the bar so the kite stays parked.
How to gybe and tack on a strapless board
A directional, the surfboard-shaped kiteboard usually ridden strapless, is a branch of the ladder rather than a higher rung. It is close to a sport within the sport.
Start on flat water, not in waves. Learn the strapless waterstart first: board across the wind, back foot over the fins, front foot centred, and dive the kite progressively rather than hard, because nothing is holding the board to you. Ride with your weight centred and your feet moving constantly. On a strapless board, foot position is your trim.
The gybe is the basic direction change, a downwind arc in which you switch your feet. Fly the kite a little higher and slow down slightly. Shuffle your back foot forward until your feet are briefly side by side. Carve through downwind while you redirect the kite.
Then swap: the new back foot slides back over the fins as you exit on the new tack. Most riders gybe first by riding out toeside and switching feet once they have stabilised, and the polished version switches mid-carve. Expect to swim, because the feet-together phase is unstable by nature.
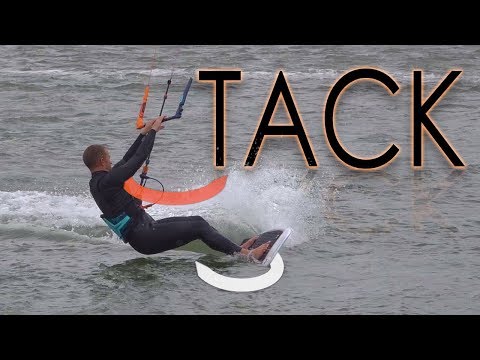
The tack is the upwind turn. It is harder, and it matters in real waves because it gives away no ground downwind and keeps your position at the peak.
Send the kite briskly to 12, push the nose of the board up through the eye of the wind, swap your feet as the board comes onto the new tack, then dive the kite to power out. Learn it once the gybe is automatic.
With the turns solid, wave riding proper starts: catching swell on minimal kite power, depowering on the face so the wave and not the kite is the engine, and linking top and bottom turns with the kite drifting downwind ahead of you.
Serve the apprenticeship on flat water first. More than 500 spots in the atlas carry a flat-water tag, and each spot page gives the water depth, the hazards and the local rules.
Watch · 2

How to ride unhooked and land a raley
Advanced Unhooking means popping the chicken loop off your harness hook and taking the kite's whole pull through your arms. It is the entry ticket to wakestyle and competition freestyle.
Power works differently. Hooked in, sheeting the bar out depowers the kite. Unhooked, the bar is effectively fully sheeted at your fixed grip: you cannot depower by pushing it away. That is why trim decides everything here.
Before you unhook, pull the trim strap so the kite sits comfortably with the bar at the sweet spot, and park the kite low, between 10 and 11 o'clock, or 1 and 2. Choose moderate power, well powered but not overpowered, and flat water.
A shallow lagoon is the natural classroom; Dakhla, where the wind blows on something like 300 to 320 days a year, is the one riders fly to for a fortnight of it.
The pop replaces the sent jump, and the kite does not move at all. Bear away toward the kite briefly to soften the line tension, unhook, then carve back hard upwind against the parked kite. Load builds violently in the lines. Release it by scooping off your back foot. Speed and edge make the height, not the kite.
The raley is the cornerstone unhooked trick, the one that unlocks nearly everything else. Pop hard and let your body swing up and back so the board and legs extend behind you, the superman position, arms bent and the bar close to your hips.
As the kite's pull swings you forward again, bring your knees back under you, land tail-first and slightly downwind, and hook back in. The faster you ride and the further back you let the load throw you, the bigger the raley. The S-bend, the 313 and the whole handle-pass family grow out of it.
Watch · 1

How to learn a kiteloop safely
Advanced A kiteloop steers the kite through a full circle downwind of you while you are in the air. It is the most adrenaline-dense move in the sport and the one with the least forgiving failure modes. Take it as a graded ladder, each rung normalising part of the sensation before it adds consequence.
- Downloops on the surface. Loop the kite downward through a transition or a straight-line ride. This teaches the steering input and the "keep pulling until it's done" commitment at almost zero risk. Do downloop transitions until they are boring.
- Downloop landings. After an ordinary jump, as you begin to descend, loop the kite above your head in your direction of travel. The kite stays high, and the loop is about control and soft landings rather than power. Do these off moderate boosts with the kite in a high, stable position. It is the first loop in the air worth having.
- Low, underpowered kiteloops. Your first true loops: a small jump, or even a hard pop, kite around 11 rather than at 12, then pull hard and continuously on the back hand until the kite completes the circle and climbs back overhead. Do them low, slightly underpowered, on a smaller kite in 20 knots or more. A 7–9 m turns faster and finishes the loop sooner.
- Powered and late loops. More height, the kite pulled later and harder, and the signature horizontal yank through the air. The higher you are when you loop, the more time the kite has to complete the circle and come back overhead to catch you. The dangerous windows are counterintuitive: very low powered loops, and mid-height ones.
- Megaloops. Wind over 30 knots, 15–25 m of height, the kite looping through the very bottom of the window, with rotations, board-offs and doubles added on top. This is competition territory.
Non-negotiables all the way up the ladder: an impact vest, a helmet once there is height in it, deep water clear of obstacles downwind, and steady rather than gusty wind, because a gust dying mid-loop leaves you under a stalled kite.
Read the spot page before you commit to a session: it lists the hazards, the rules and whether the wind there is gusty. Plenty of excellent lifelong kitesurfers never loop. It is a choice, not a requirement.
Watch · 1

How to learn to kite foil
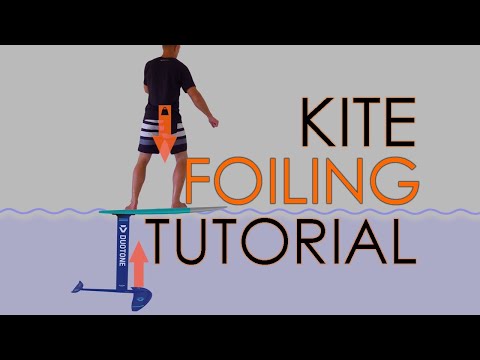
Intermediate A kite hydrofoil is a mast and wing under the board that lift the board clear of the water. It rewrites the light-wind rulebook: a foiler rides in 8–12 knots, where a twin-tip needs a big board and a good day, and 12–15 knots is the sweet spot for learning.
Prerequisites. Solid kite control, confident twin-tip waterstarts, and ideally some strapless directional time, which breaks the twin-tip habit of leaning against a hard edge. On a foil that habit is exactly wrong.
Beginner gear. A large, low-aspect front wing around 1250–1500 cm² and a short mast, 40–60 cm to start, moving toward 85–90 cm after roughly 20 to 30 sessions. Small, fast race wings of around 1100 cm² come much later.
The session-by-session arc. Session one is logistics: carrying the thing, body-dragging with a mast and wing bolted under the board, then riding the board on the water, which foilers call taxiing, weight committed over the front foot and the foil deliberately kept down. Then come micro-flights: small pumps of back-foot pressure lift you 10–20 cm, you fly for a second or two, you touch down flat, again and again.
Flights lengthen, touch-and-go becomes sustained flight, then come toeside and carving gybes, feet still, the foil carving on weight shifts measured in millimetres, and finally foil tacks. How long that takes varies enormously: 15 minutes to 10 hours of water time before the first sustained flights.
Two hours with a foil-specific instructor collapses the curve. 765 of the 1,606 schools in the atlas list foil among their services, and the destination page shows which ones. Practise in flat water with long, unobstructed runs.
Foil racing is also the Olympic form of the sport. Formula Kite, raced on a supplied foil kite and hydrofoil board, made its Olympic debut at Paris 2024.
Watch · 1
How to kitesurf in light wind
Light wind, roughly 8–14 knots on a twin-tip, is where technique is most exposed and most improved. Four things do the work:
- Keep the kite moving. A parked kite in 10 knots generates almost nothing. Big, smooth sine-wave strokes through the window create apparent wind and keep you planing. Sheet out slightly to let the kite fly faster through the window, then sheet in for a power spike exactly when you need it.
- Stand tall. Abandon the locked-out heelside edge. A more upright, centred stance, closer to 50/50 weight distribution, lets the board carry your weight so the kite does not have to.
- Speed before angle. Point lower, build speed with the kite deep in the window off the waterstart, and only then squeeze upwind. Pumping the board with rhythmic back-foot pressure holds the plane through lulls.
- Gear. A large, door-style twin-tip of 145 cm or more, or a light-wind-specific board, transforms the low end. So does a foil.
How high can you jump kitesurfing?
The Red Bull King of the Air has run at Big Bay and Blouberg in Cape Town since its 2013 relaunch, moving to Blouberg proper in 2018, and it pulls crowds of more than 7,000 a day.
The event holds a multi-day waiting window in late November and early December, and it runs only when the Cape Doctor, the south-easter behind Blouberg's November-to-March season, delivers a consistent 35 knots or more. Riders throw megaloops, late rotations, board-offs and doubles in a knock-out format, judged on height, extremity, variety, technicality and landings.
The Big Air Kite League built a full season around the discipline, five or more events a year at the windiest venues on the calendar: Cape Town, Tarifa, where a strong Levante runs 20–40 knots, Tatajuba in Brazil, Gran Canaria, and the French Mediterranean, where the opening stage, Lords of Tram, runs at Parc des Dosses in Leucate / Barcarès on a Tramontane that regularly passes 30 knots.
Judging is weighted roughly 70% height and 30% "extremity", plus variety bonuses across a rider's top-scoring tricks. The GKA World Tour also runs big air events, scored by trick category so that only your best score in each family counts, a format that rewards complete riders over one-trick specialists.
Measurement drove the arms race. The WOO sensor, launched in 2013, is the standard height tracker, and its leaderboards carried the record from Gijs Wassenaar's 29.6 m past Maarten Haeger's 32 m to the first jump over 40 m: Hugo Wigglesworth, 40.0 m at Kite Beach in Cape Town, on 6 December 2025.
How to stop plateauing
The difference between a rider stuck on jumps and back rolls forever and one who keeps advancing is rarely talent. It is process.
Research the trick like a student. Before a session, watch several different tutorials of the same trick, because every coach points at something different. Watch each one more than once with a single focus per pass: the kite, then the bar, then the body and board, then the timing that links them. Seeing the same movement from several angles is what plants the markers your subconscious reaches for in mid-air.
Visualise deliberately. Before and between attempts, run the whole film: the approach, the send or pop, the body position at the apex, the landing, and the feeling of landing it. Sports psychology applies to kiting the way it applies to anything else. Your body performs what it has rehearsed and believes.
Structure the session. Arrive with two or three target tricks matched to the day's conditions. Light wind means transitions, toeside and unhooked pop; strong wind means boosting and loops.
Attempt new tricks early, while you are fresh, because fatigue is when technique collapses and injuries happen. Commit fully to each attempt: a half-hearted kiteloop is more dangerous than a committed one. When hesitation strikes, use a trigger. Count 3-2-1 and go.
Film and review. A GoPro on a line mount, a helmet or a short pole, shooting 60 fps, or 120 fps for slow-motion analysis, with a horizon-locking lens such as the Max Lens Mod on a Hero 9 or later, turns every session into coaching footage.
Review the same attempt against the tutorial. The gap between what you think you did and what the camera shows is where the fix lives. Video-coaching platforms such as Progression and the North Academy app exist for that loop.
Typical plateaus and their cures
| Plateau | Usual cause | Cure |
|---|---|---|
| "I can ride but can't jump" | Timing or edge: sending the kite while flat, or sheeting in before the edge is loaded | Exaggerate the J-hook carve; practise sent jumps in marginal power, where mistakes are cheap |
| "My jumps stopped getting higher" | Riding too underpowered and sending too slowly | Size up or wait for wind, sharpen the send, hold the edge one beat longer |
| "Stuck at back rolls" | Fear of the front roll's blind phase | Trampoline and land rehearsal, grab mid-rotation to slow the spin, and remember that the head leads the rotation |
| "Unhooked terrifies me" | Usually a trim problem wearing the costume of a courage problem | Re-trim so the kite sits sweet at fixed bar, park it lower, start with straight unhooked pops before any trick |
| General staleness | Same spot, same wind, same three moves | Change the constraint: ride a directional for a month, chase a light-wind foil skill, book a wave or flat-water trip, ride with better riders |
The other way out of a plateau is other people. 479 schools in the atlas run camps, 264 run downwinders and 45 list freestyle coaching, and the school list on each destination page says which is which. A coached week on flat water moves most riders further than a whole season of solo sessions at the home spot.
Questions riders ask
How much wind do I need to learn to jump?
Roughly 15 to 20 knots of steady side-onshore wind, with a kite at the top of its comfortable range; a 12 m in 15 to 25 knots is the classic setup. Flat-ish water and plenty of room downwind matter as much as the number does.
Why does my kite not lift me when I send it?
Almost always timing. You are either sheeting the bar in before the edge is loaded, or sending while the board is flat. Exaggerate the upwind J-hook carve, send with the bar out, and sheet in only as the kite reaches 12.
What kite size should I use for my first kiteloops?
Something small and fast: 7 to 9 m in 20 knots or more. A smaller kite turns faster and completes the loop sooner, which is what you want while you are still learning to keep pulling.
Do I have to learn kiteloops?
No. Plenty of lifelong kitesurfers never loop, and downloop landings give you much of the control benefit at a fraction of the risk.
How long does it take to fly a hydrofoil?
Anywhere from 15 minutes to 10 hours of water time before the first sustained flights. Start on a large low-aspect wing of 1250–1500 cm² and a short mast of 40–60 cm, and buy two hours with a foil instructor if the spot has one.
Can I still ride in 10 knots on a twin-tip?
Yes, on a big board of 145 cm or more, and only if you keep the kite moving. Sine the kite through the window, stand tall instead of edging hard, and build speed before you ask for upwind angle.
Chapter 11 · Part V · The Kitesurfer's Life