All 14 chapters
In this chapter
Each of these has its own pageThis chapter is the fix list for the things that go wrong on the water: how to relaunch a kite from the water, how to do a kitesurfing self-rescue in deep water, how to body drag upwind to get your board back, how to stop a death loop, and how to self-land when nobody is on the beach. Every technique here is one you rehearse on an easy day, on purpose, before the day you need it. The middle of an emergency is the worst classroom there is.
A kite that won't relaunch, a snapped line, a squall line on the horizon, another rider's lines through yours: nobody rides for long without meeting at least one of these. Having the next three moves in your hands is what separates a self-sufficient kiter from a liability on the water.
How to relaunch a kite from the water
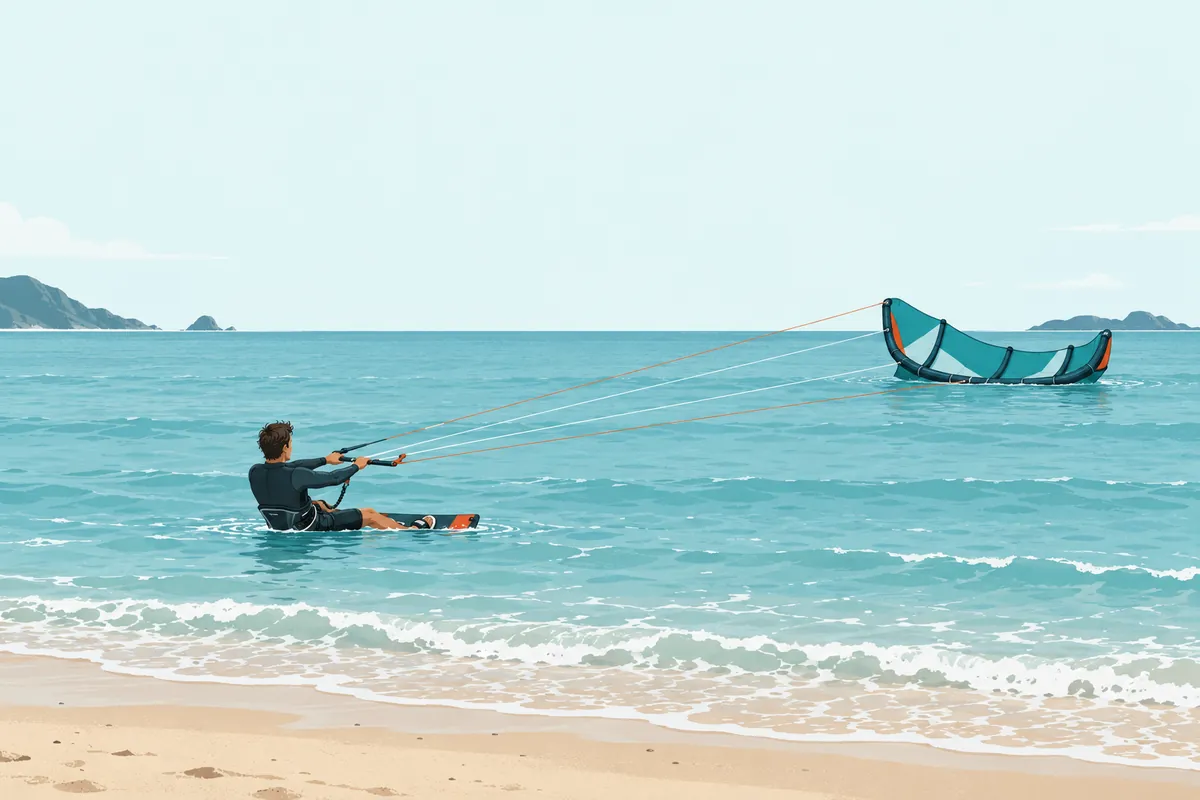
Water relaunch is the recovery skill you use most. Crashing is normal; getting the kite back in the air within a minute is what keeps a crash from turning into a swim. Every relaunch works the same way: kite to the edge of the wind window, up onto one wingtip, then fly it out.
Bow and hybrid kites (the modern standard)
Almost all modern kites are bow or hybrid designs with swept wingtips and depower bridles, and they are built to relaunch easily. The standard sequence:
- Let go of the bar completely. This is the step beginners get wrong most often. Bow and hybrid kites need the bar fully sheeted out (depowered) before they will move to the edge of the wind window. Pulling the bar in pins the kite on its back.
- Let the kite settle leading-edge down. If it crashed trailing-edge down or nose-down, a short steady pull on both centre lines will usually flip it onto its leading edge.
- Grab one steering line, ideally the one running to the wingtip closest to the edge of the wind window, near the floater at the bar end. Pull it in steadily, hand over hand, keeping the bar itself released.
- Wait for the drift. The kite slides toward the edge of the window and one wingtip lifts off the water. Keep gentle, constant tension; the kite will rotate up onto that wingtip.
- Steer up gently. When the kite reaches roughly the 9 or 3 o'clock position on its wingtip, release the steering line, take the bar, and steer up toward 10–11 o'clock (or 1–2 o'clock). Do not yank it straight to 12. In gusty conditions that invites an overflight and a second crash.
In light wind, under about 10–12 knots, the kite needs help: swim a few strokes toward it to create slack, then "pump" the centre lines, or drag yourself upwind so the wind can get under the canopy.
C kites
Advanced Traditional C kites, still ridden by some wakestyle riders, lack the bridle that makes bow kites pivot easily, so the technique differs: increasing rear-line tension cups the trailing edge, which lets the kite pivot up onto a wingtip.
Pull one rear line in far, often several arm-lengths, until the wingtip rises; keep it coming until the kite is on its side at the window edge, then steer up. In light wind, a C kite may need to be pulled into a downwind "taco" and flipped, or may simply not relaunch at all, in which case you move straight to self-rescue.
Inverted kites and wrapped lines
A kite inverts (rolling through its own lines, or wrapping a line around a wingtip) for one of two reasons: it falls out of the sky and the lines go slack, or it hits the water and you keep moving toward it, again killing line tension. Your options, in order of preference:
- Do nothing for 30–60 seconds. Hands off. The wind pushes the kite downwind, tension comes back into the lines, and a surprising number of inversions and half-wraps sort themselves out. Watch the kite; don't wrestle it.
- Relaunch anyway. If the kite comes up and flies acceptably despite a crossed line or a wingtip wrap, do not try to fix it on the water. Fly it conservatively, low in the window, and ride or body-drag straight back to the beach to sort it out on land. A flying kite with a cosmetic tangle beats a perfect line set 500 m from shore.
- Bar juggling Advanced (light wind only). To undo a full inversion, unhook your safety leash, open the chicken loop and, holding both centre lines so the kite stays depowered, pass the bar through the centre lines to reverse the twist. Watch that the outside lines don't wrap the bar as you spin it.
- Self-rescue. If the kite is badly rolled in its own lines and won't fly, don't fight it. Pull your quick release and go to the full self-rescue below. An inverted, unflyable kite is one of the most common triggers for one.
Watch · 2


How to do a kitesurfing self-rescue in deep water
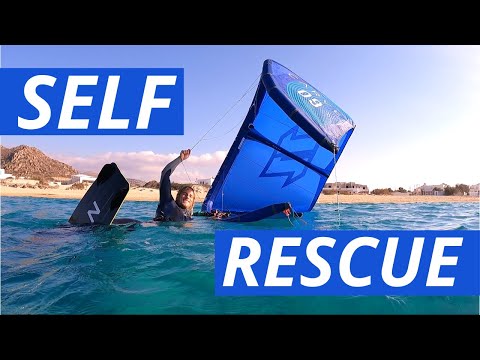
A self-rescue is how you bring yourself and your kite back to land when the kite will not fly. It runs in one fixed order: flag the kite on its safety line, get to the bar, wind the lines on (or swim down the safety line without winding), flip the kite leading-edge up, then use the kite as a sail and go downwind to the nearest safe shore.
It is the most important safety skill in the sport and the one most riders have only ever done standing up in waist-deep water.
That demonstration does not count: with nothing under your feet it feels completely different. Practise it properly once a season, in moderate wind, close to a safe beach. A shallow lagoon like Sicily - Lo Stagnone, ankle to waist deep, is where you learn the hand movements; deep water is where you find out what they cost.
Self-rescue is the right call when:
- The kite is inverted or tangled and won't relaunch.
- The wind has died and the kite won't stay up.
- A line or bridle has broken.
- You are injured, exhausted, or being carried toward danger.
Step 1: flag the kite
Activate your chicken-loop quick release. The kite flags out onto the single safety line, loses all power, and falls to the water downwind of you. Wait until it settles with tension only in the safety line.
Step 2: get to the bar and secure it
Pull yourself hand-over-hand up the safety line to the bar. There are two methods, and you want both.
The classic line-wrapping method (the IKO syllabus version):
- Secure the safety line to the bar. Wrap it on, locking each pass with the bar-end line-winders, and finish with two half-hitches so nothing can unwind.
- Wind all four (or five) lines onto the bar together, keeping steady tension, working your way toward the kite. Keep the winding neat: this bar has to be usable next session.
- Secure the lines at the kite. When you reach it, lock all lines with a final half-hitch or the bar's elastic keepers, and clip or tuck the bar into the back of your harness.
The fast "no-wrap" method: in strong wind or when speed matters, skip winding entirely. Pull yourself hand-over-hand down the safety line only until you reach the kite, and let the bar and lines trail downwind behind the kite as you sail in.
Step 3: sail the kite to shore
With the kite on its back on the water:
- Flip the kite so the leading edge faces up and into the wind. Grab the leading edge at the centre or a wingtip and lever it over.
- Bend the kite into a sail. Take hold of the outside bridle or wingtip and pull it toward you, curving the kite into a C-shape that catches the wind.
- Position yourself at one wingtip. Hook an arm or armpit over the leading edge and let your legs trail in the water as a rudder. Don't park yourself in the middle of the kite; it kills the sail shape.
- Sail on a broad reach. You can hold up to roughly 45 degrees either side of dead downwind. Pick the closest safe landfall downwind: a self-rescue never goes upwind. If you still have your board, tuck it under your chest arm or slide your feet into the straps; it improves your steering noticeably.
Step 4: if shore isn't reachable, raft up
If the wind is dying, the distance is long, or you're waiting for rescue, keep the kite inflated and climb onto it as a raft, staying low across the leading edge and struts.
Stay with the kite: a 9–12 m canopy is visible from the air and from a boat in a way a lone swimmer's head never is. The recognised kitesurfing distress signal is one arm raised straight up, waved slowly side to side.
Deep-water pack-down (only when you must)
Pack down fully only if you have to swim through shorebreak, board a rescue boat, or the flapping kite has become unmanageable:
- Wind and secure all lines first, exactly as in Step 2.
- Deflate the leading edge. Open the deflate valve, keeping it up out of the water so water can't enter the bladder. Leave the struts inflated if your kite allows; they keep it floating.
- Roll from the tips. Fold the kite with the deflate valve on the upper side, grab both wingtips, and roll tightly from the tips toward the valve, squeezing air out as you go. Close the valve.
- Bundle and go. Strap the rolled kite together with the bar, your harness webbing, or the kite's own bridle, lay it across your chest, and backstroke in, or hand the bundle up to the boat.
Watch · 3


What to do if a current or offshore wind pulls you out to sea
Spots that live with offshore wind organise around that rule. At Soma Bay the wind blows off the land almost everywhere in the bay, so every station runs a rescue boat and charges for it on top of the lessons.
Where riders disagree about a spot, the disagreement is the warning: at Cabo de la Vela the wind is offshore in the bay at dawn and swings side-shore by mid-morning, and the regulars call it safe because there is land downwind and the bay is busy with fishermen, while others point to thin rescue cover and 40-knot days.
In May 2023 a rider went missing eight kilometres south of the village and was never found.
If you are being carried out despite all of that:
- Assess honestly and early. Are you making ground toward shore, holding position, or losing? Losing ground for ten minutes means you'll be losing ground in an hour, only far more tired.
- If the kite still flies, stay powered. Ride or body-drag on the most direct safe line to land, even a beach far downwind of your launch. Distance along the shore is a walk; distance from the shore is a swim.
- If the kite won't fly and the wind has any onshore component, self-rescue sail as described above.
- In a rip current, common at surf beaches, do what a swimmer would: don't fight it head-on. Rips are typically narrow, so sail or drag across the current, parallel to the beach, until you are out of it, then head in. Cape Town - Blouberg/Big Bay is the standard case, and its destination page flags shore break and rip currents there as more serious than they look from the beach.
- In true offshore wind with no boat, deflate the leading edge (struts inflated), roll the kite around itself, bind it with your harness, and paddle it toward shore like a surfboard. Expect well under 1 knot of progress, which is why the rule is prevention. If you are far out, the wind is building and land is unreachable, stay with the kite as a raft and signal for rescue. Abandon gear only if the kite itself is dragging you into worse danger and the shore is close enough to swim.
- Tell someone your plan before every session, and carry a phone in a waterproof pouch, or a VHF radio on exposed coastlines.
What to do when your lines tangle with another kite
Mid-air and in-water tangles between two kites are chaotic, and the correct response hinges on one question: are the kites still controllable?
If both kites are still flying after lines touch:
- Do not punch your quick release reflexively. Releasing at the first sign of trouble is often the worst move: you lose all control of your kite, and your flagged kite and bar can foul the other rider's gear, leaving them attached to two out-of-control kites.
- Both riders bring their kites low, near the water, on the same side of the window, communicate loudly and calmly, and move toward each other to create slack. Often one kite can be steered gently out of the tangle, or the riders drift together, pass a bar over or under, and separate.
If the kites are wrapped and out of control:
- Both riders release together. Shout "RELEASE!" and both hit the quick release. Two flagged kites fall to the water without power and can be untangled at leisure. The dangerous scenario is exactly one rider releasing.
- The exception to all of the above: if someone is being dragged toward a hard object, rocks, a pier, a boat, release immediately regardless of the other kite. Property is replaceable.
Once you're in the water: keep your hands out of loaded line clusters, use your hook knife if a line has wrapped a limb and is loading up, then sort the spaghetti methodically starting from one bar. Afterwards, inspect every line and bridle on both kites before relaunching. A nicked line breaks next session, not this one.
How to stop a kite death loop
A "death loop" is a kite locked into continuous power loops that the rider can't stop, usually because a steering line has wrapped around the bar, the bar end, the chicken loop or the leash, so the kite receives a permanent turn input. It generates enormous repeated power and drags the rider downwind with each loop. The response hierarchy, in order:
- Hit your quick release. In most cases the kite flags out and it's over. Practise locating and firing your release blind, every session, so your hands know the movement under stress.
- Stall the kite. If the release is jammed or the kite keeps looping (a wrap can defeat the flag-out), grab the outside steering line that is not powered, the far line, and pull it in hard, arm over arm. The kite stops looping, back-stalls and falls out of the sky. Grip the line through fabric (sleeve, glove) if you can, and never loop it around your hand or fingers.
- Last resort: release your safety leash entirely. You are now separated from the kite. Do this only when steps 1 and 2 have failed and you are being dragged toward danger. A loose looping kite downwind is a serious hazard to everyone else, so shout warnings.
- Secure the aftermath. Once the kite is down and stalled, keep tension on the stalling line while you clear the wrap from the bar, or go straight into self-rescue.
What to do when a line breaks or gear fails mid-session
A line snap announces itself unmistakably: a bang, then the kite falls, spins, or starts looping. What you do next depends on what broke.
- Steering (outside) line: the kite may start looping on the intact steering line. Treat it as an incipient death loop. Hit the quick release; the kite flags on the front-line safety and stops.
- Centre/front line: the kite loses its shape and usually falls. Release to the safety anyway, but be aware that with only three intact lines a flagged kite can still spin erratically. Get to the bar, get control of the situation, and self-rescue.
- Bridle or pulley failure: the kite flies lopsided or won't depower. Fly it minimally, low in the window, straight back to the beach; if it's unmanageable, release and self-rescue.
- Chicken loop or harness failure: hold the bar unhooked only long enough to bring the kite low and ditch power, then release and self-rescue. Don't try to ride home unhooked in strong wind.
- When to cut: if a broken line has wrapped around your body or legs and is loading up, cut it. That is exactly what the hook knife is for, $15–30 (2025) and living in a pocket on virtually every modern harness. Know where yours is before you need it, and check it's still there every few sessions.
How to get your board back: the upwind body drag
Beginner You will drop your board hundreds of times, and because it drifts downwind more slowly than you do, after a crash the board is almost always upwind of you. The upwind body drag is how you get it back.
It is also your engine for getting home when you can't ride, and step one of most rescues. Every serious syllabus tests it: IKO and VDWS, the two certifications that come up most often across the 1,606 schools in the atlas, both want it before you ride alone.
- Stop and spot the board first. Take a breath, get the kite stable at 12, and fix the board's position before you start moving.
- Park the kite at 10–11 o'clock (or 1–2 o'clock) on the side you want to travel toward, so kite and board are on the same side of your body. Fly it with one hand, holding the bar near its centre so the kite sits steady without input.
- Make your body a keel. Extend your free arm in the water, roll onto your side (not belly or back: a flat body makes no lateral resistance), body rigid, legs together, and let the kite pull you along your arm's line. You can point roughly 45 degrees into the wind, mirroring the board's upwind angle when riding.
- Tack. Drag 7–8 m on one side, then slowly float the kite through 12 o'clock, swap hands, roll onto the other side, and drag back the other way. Zig-zag upwind toward the board, keeping it over the shoulder of your bar hand.
- Approach slightly upwind of the board. You always slip a little leeway. Grab it, hook your feet in, and water-start.
Watch · 1

What to do if a squall hits while you are riding
A squall is the gust front of an approaching storm or shelf cloud. It can double or triple the wind in seconds, back it 90 degrees or more, or drop it to zero and then slam it back.
Riders have been lofted tens of metres and killed by squalls. Even friendly spots produce them: at Lazzaro & Punta Pellaro, on the Strait of Messina, a crowded, playful afternoon turns serious on a sudden squall, with an offshore current running underneath it.
- Prevention does nearly all the work. Watch the sky upwind, not just your kite. A dark line on the horizon, a sudden temperature drop, rain shafts, whitecaps racing toward you: get off the water now. From "that cloud looks dark" to impact can be under ten minutes. Rig a smaller kite than usual when storms are forecast.
- If it hits while you're on the water, stay on the water. Water is the safest place to absorb violent power. Worst case you get dragged, which beats being lofted onshore into cars, buildings or a rock wall. The single most dangerous place to be is standing on the beach with the kite up, or landing it, when the gust arrives.
- Keep the kite low, parked at the edge of the window near the water, never overhead at 12 where a gust converts straight into vertical lift.
- Ride with a hand near your release. If you're being dragged and can't control it, release to the safety and let the kite flag. If the flagged kite is still dragging you dangerously, which happens above 40 knots, release the leash completely and let the kite go.
- Use the lull wisely. After the gust front, squalls often bring a lull or a big direction shift. Use that window to self-rescue or get to shore. Don't relaunch into the second act of the storm.
How to self-land a kite when nobody is on the beach
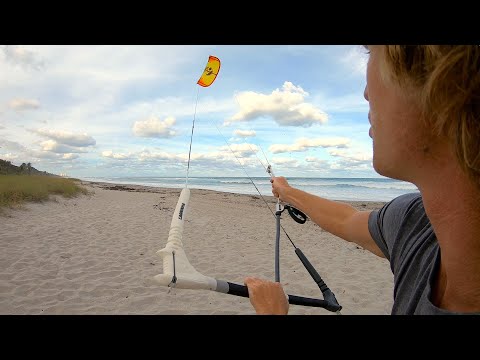
Intermediate Self-landing is an advanced skill, best learned under instruction and in light wind first. The consensus limit is to self-land conventionally only up to about 15 knots; above that, use the flag-out method, or head back out and do a deep-water pack-down instead. Only ever self-land with a big clear area, nobody downwind, and never in gusty conditions if you can avoid it.
Method 1: flag-out and walk up (safest, works in more wind)
- Position yourself with clear space downwind.
- Flag the kite. Bring it low to the edge of the window, then activate your quick release. The kite flags onto the safety line and falls with almost no power.
- Walk up the line. Go hand-over-hand up the single tensioned line to the kite, then immediately flip it leading-edge-up or weight it down; sand on the canopy centre works on a beach.
- Accept the cost. Your lines need re-sorting before the next launch. Small price.
Method 2: wingtip grab (tidier, light to moderate wind only)
- Park the kite at roughly 45 degrees, then steer it gently down toward the ground at the window's edge.
- Grab the top front (leading edge) line as the kite descends and pull it in hand over hand; the kite's upper wingtip pivots down toward the ground.
- Walk toward the kite as you pull, killing line tension, until you can grab the wingtip itself. Secure the kite immediately.
Method 3: fixed-point landing
Hook the chicken loop or a bar hook over a well-anchored post or rail built for the job, common at kite schools, then walk to the kite while it flags. Improvised anchors (fences, car tow hooks) fail more often than you'd think. Inspect before trusting.
Watch · 1
How to get back upwind, and the walk of shame when you can't
Every kitesurfer alive has done it. You couldn't hold your ground, you've drifted 400 m down the beach, and now you're trudging back with the kite overhead and the board under your arm. The community calls it the walk of shame. It should carry no shame at all: it means you correctly chose walking over exhaustion or a rescue.
Etiquette and technique for the walk itself
- Walk at the water's edge with the kite parked low over the water, on the side away from land, never over sunbathers, dunes or the car park.
- Hold the bar with one hand near its centre, depowered; carry the board in the other hand, using it as a wind-block and keel if gusts push you around.
- Give launching and landing riders a wide berth. You have less manoeuvrability than they do. Pass behind other kiters' lines, never through them.
- If the walk is long and the beach crowded, land the kite, wind your lines and carry everything. Slower, but safer.
Fixing the underlying problem
Beginner The walks get shorter as your upwind technique improves:
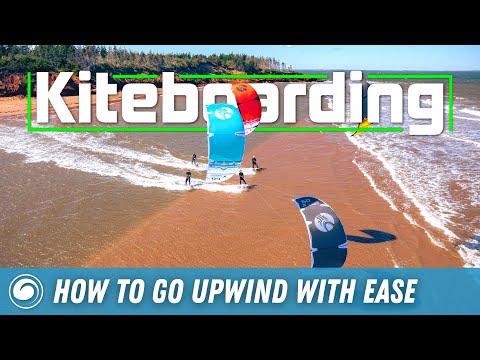
- Look where you want to go, not at the kite. Staring at the kite, which is downwind, twists your shoulders downwind and the board follows. Point your leading hand and your eyes at a target on the upwind horizon; shoulders, hips and board follow.
- Edge, don't sink. Weight on the back half of the board through your heels, board tilted onto its upwind rail, body leaning back against the kite's pull, hips forward in a straight stance, not the crouched "poo stance".
- Balance angle against speed. Pinch too hard upwind and you stall; bear away, rebuild speed, then carve back up. Speed first, angle second.
- Keep the kite lower, around 45 degrees, roughly the 10:30 or 1:30 position, and steady. Every big kite movement through 12 drags you downwind.
- Know the honest exceptions. If you're underpowered on too small a kite, or the wind has dropped below your gear's range, no technique will save you. Ride in early, take the walk, and re-rig.
Watch · 1
Safety habits to build before you need them
Every scenario here gets easier when the fundamentals are already reflexes:
- Practise your quick release monthly until firing it is a reflex, and reassemble it correctly afterwards.
- Practise a real deep-water self-rescue at least once a season, in 12–18 knots, at a familiar spot with an onshore component, with someone watching from the beach.
- Carry the kit: a hook knife (checked regularly), a phone in a waterproof pouch on exposed water, and ideally a whistle.
- File a float plan. Tell someone where you're riding and when you'll be back.
- Never ride alone in offshore wind, and never trade a storm-front warning for one more run.
Organised rescue helps, but it replaces none of that. Squamish sells a jetski rescue with the day pass at the Spit, and the people who ride there most still set the bar at holding upwind, recovering your own board and self-rescuing first.
Handled by the numbers, almost every kitemare in this chapter ends the same way: you, on the beach, wet and slightly annoyed, with a story and all your gear. That outcome is a skill. Train it.
Questions riders ask
How do you relaunch a kite that has crashed in the water?
Let go of the bar so the kite depowers, then pull one steering line in steadily, hand over hand, until the kite slides to the edge of the wind window and rises onto a wingtip. Take the bar again at 9 or 3 o'clock and steer up to 10–11 (or 1–2). Pulling harder is the mistake, not the fix.
How long does a kitesurfing self-rescue take?
In one timed comparison, winding every line onto the bar took an experienced rider about 4.5 minutes in 15–18 knots; swimming down the safety line without winding put them at the kite in under 30 seconds. Wind the lines when you have time and space.
What do you do if your kite starts death-looping?
Fire the quick release first. If a wrapped line defeats the flag-out, grab the unpowered outside steering line and pull it in arm over arm until the kite back-stalls and drops. Releasing the leash and losing the kite is the third option, not the first.
Can you land a kite on your own?
Up to about 15 knots, yes: walk the kite down on the front line to a wingtip, or use a fixed anchor built for it. Above that, flag the kite on the quick release and walk up the single tensioned line.
How do you get your board back without a board leash?
Upwind body drag: park the kite at 10–11 or 1–2 o'clock on the side you're heading, extend your free arm as a keel, roll onto your side and tack 7–8 m at a time up to the board. Board leashes are banned by essentially every school: a leashed board slingshots back at your head.
What should you carry in case something goes wrong?
A hook knife in the harness pocket ($15–30, 2025), a phone in a waterproof pouch (about €30, 2025) on exposed water, a whistle, and a plan you have told somebody on land. On offshore-wind spots, add a rescue boat or don't go out.
Chapter 09 · Part III · Wind, Water & Risk